
Editor's Note: This post was originally posted in October 2016 and has been completely revamped and updated for accuracy and comprehensiveness in October 2019.
Halloween is fast approaching, and this year, Expert Home Tips have gone all out. We've already eaten delicious cupcakes, and now, we're decorating a pumpkin to rival all pumpkins.
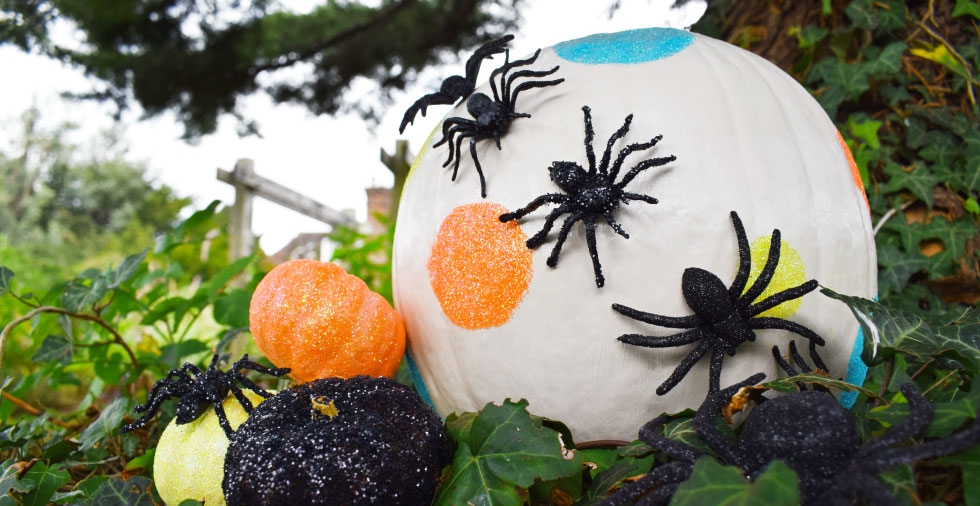
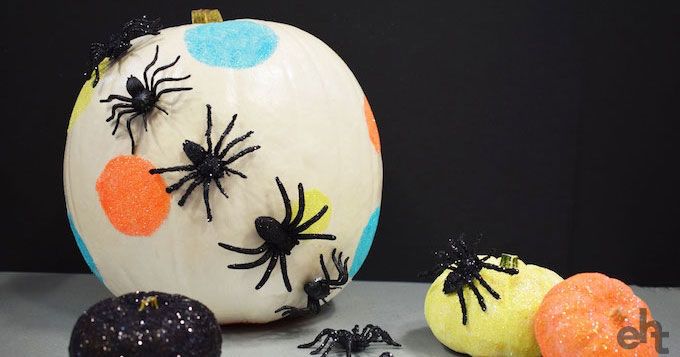
Standard carved pumpkins are so 2009. If you've been active on Pinterest recently, you'll know that the last thing you should be doing with your pumpkin is cutting it. Glitter, paint, stickers...whatever you like, just stay away from that knife. With that in mind, I came up with my own carve-free creation. Lo and behold, the neon-sparkle spider pumpkin:
Pretty cool, right?
When we were scouring the net for inspiration, the paint and patterns were quite overwhelming - would we be able to make something equally impressive? Once we got stuck in, however, we realized it's all about having fun and not sticking to a plan too rigidly - mistakes will happen, and that's ok!
If anything, decorated pumpkins are actually easier than the standard carved versions. The thing that makes them different is the lack of permanence - when you carve, a slip of the hand and there's no going back. With paint, glue and glitter, there's nothing you can't cover up or scrape off multiple times to get the desired results.
We're going to show you step-by-step how we made ours, but what we really encourage is for you to design your own. Your pumpkin should be - and can be - as unique as you, so make it special! It's sure to impress your Halloween guests.
Right, enough talking, let's get cracking.
How to make a no-carve pumpkin
1. Mix your paint
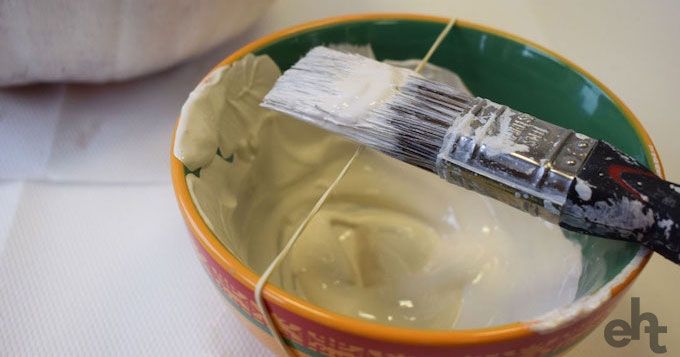
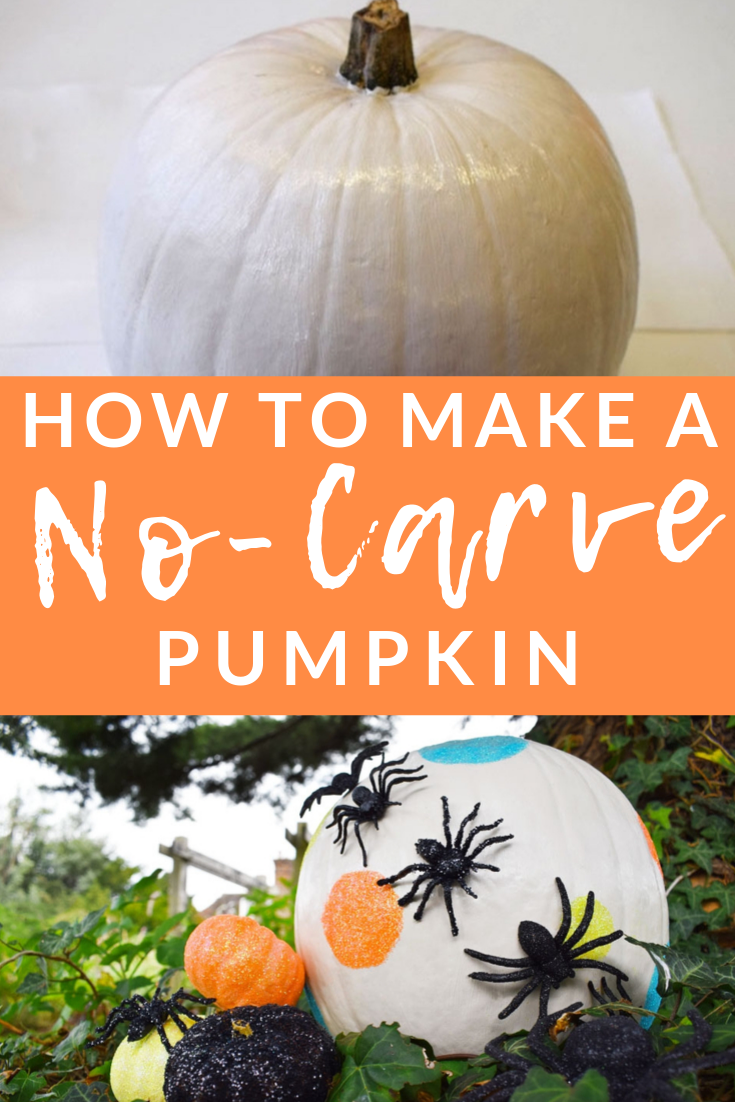
Orange pumpkins everywhere are getting a facelift - we chose cream paint for an alternative look. Take your acrylic paints (we used fawn and titanium bought from Rymans) and mix with a generous helping of water to thin it out. As you can see, we used one of our very own top tips to make matters easier - an elastic band over the mixing bowl to wipe off excess paint.
2. Paint your pumpkin
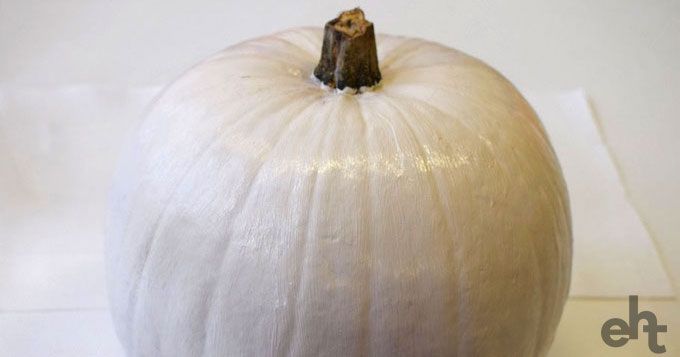
With the pre-mixed paint, apply your first layer. This should glide on easily so, if it doesn't, add more water. Let the first layer dry completely before applying a second, and so on. We did a total of three coats to make sure the pumpkin was totally covered.
3. Get glueing
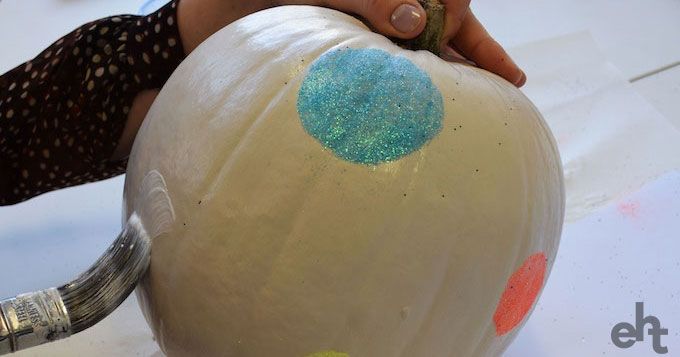
Pour some PVA glue into a container and add a few drops of water. Mix to combine, then using a smaller brush, apply the glue in circles to your pumpkin. We completely made the size and positioning of these circles up as we went along, but feel free to draw them on in a very light pencil before you start.
4. Make it sparkle
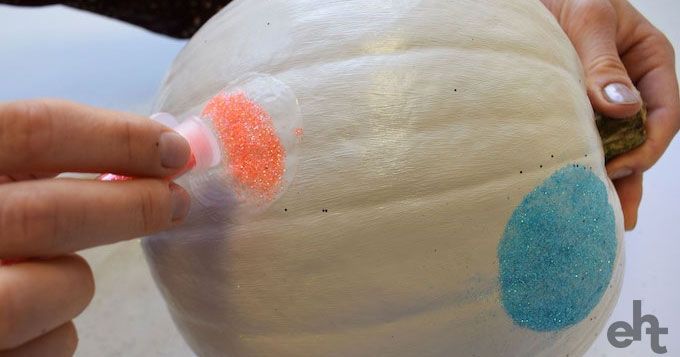
Now for the fun part! We used a set of glitter shakers from Tiger to sprinkle glitter over my glue circles. The shakers were great as the small holes made application easy and meant the glitter wasn't wasted. Sprinkle over gently, then use your fingers to lightly dab and rub glitter over patchy areas of the spots.
5. Add sparkle to spiders
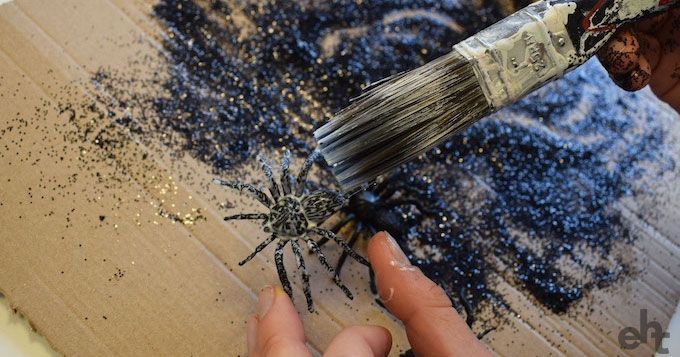
For all the squeamish people out there, it's time brave the creepy crawlies. Taking 8 of 10 plastic spiders (mine were from Sainsbury's), paint the tops with a layer of the PVA that you mixed earlier. Then sprinkle black glitter, (We bought ours from Amazon) over them, covering the surface as best you can. Set aside and leave to dry.
6. Pin your pumpkin

How did we stick those spiders on anyway? Here's the secret: take a round-headed pin and cover the end with a blob of blu tac. Stick this inside the hollow of your glitter spider, and then pierce into position on the pumpkin. They will glide in surprisingly easy, so there's no risk of hurting yourself. Repeat for 3 of the spiders, alternating with non-glittered spiders. We also included two pre-glittered plastic spider from Tiger, which came in a set of three, but you could achieve the same effect without these.
7. Final flourish
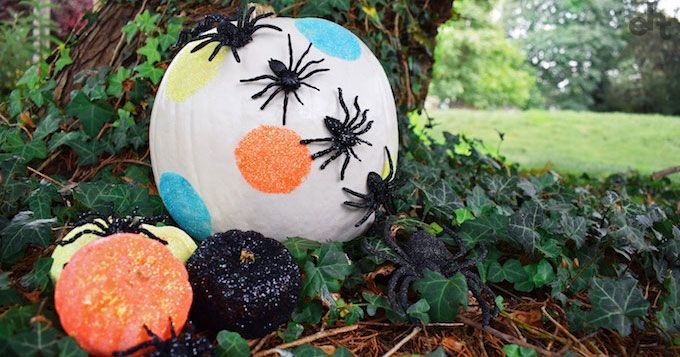
In order to really give our pumpkin the WOW factor, we dolled up three mini squashes to sit alongside it. If this is something you want to do, too, all you need is that trusty PVA from earlier and a generous coating of glitter. We scattered the remaining glitter spiders around, and on the mini pumpkins. Now, all that's left is to take it outside, and let the festivities begin!
We hope you enjoyed seeing our pumpkin creation as much as we enjoyed making it - let us know if you think it has the WOW factor in the comments below!

Leave a Reply