

- Why do we carve pumpkins?
- Safety advice
- How to carve a pumpkin
- See how we did it
- Roasted pumpkin seed recipe
Do you know how to carve a pumpkin? Now that we're in October, it's time to get the lowdown. Today we're sharing some all-new tips to help you make this year's designs the best yet!
We've even thrown in a delicious recipe so that you can put the pumpkin seeds to use! Read on and find out how to have the best Halloween ever.
Why do we carve pumpkins?
Although pumpkin carving is mostly an American tradition, it originated from an Irish myth. The legend of "Stingy Jack" describes how a man, named Jack, had a drink with the devil.
Not wanting to pay the bill, Jack had the devil turn himself into a coin so that they could pay for the drinks. Jack decided to keep the coin for himself, storing it next to a silver cross in his pocket that would stop the devil from changing back.
Eventually, Jack freed the devil but only if he promised not to claim Jack's soul. When Jack died, he was not allowed into heaven or hell. The devil sent Jack off with a burning coal to light the way. He placed the coal into a carved turnip, much like the pumpkins we display now.
The name Jack-O'-Lantern derives from the Irish naming of his ghostly figure as "Jack of the Lantern". They would make their own lanterns to ward off evil spirits. The tradition was taken to America, where they found pumpkins to be the perfect gourd for carving!
Safety advice
Never let children carve pumpkins unless under your total supervision and preferably using a safe pumpkin carving kit.
They can still get involved by drawing on designs and hollowing out the pumpkins with their hands.
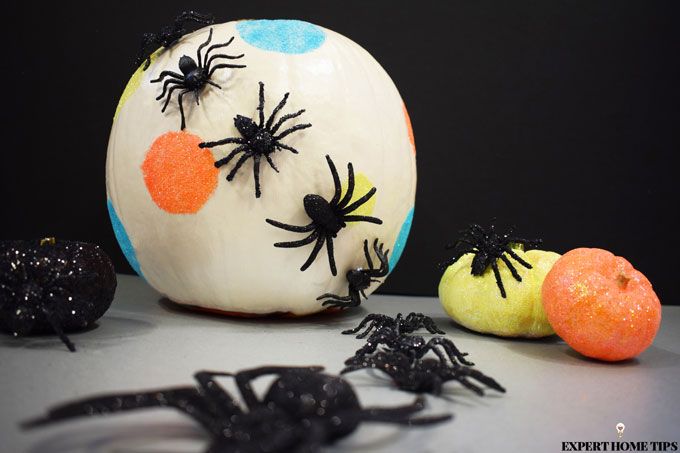
If you're not ready to get stuck in with knives, opt for a no-carve pumpkin design so that they can get involved decorating it with paints and glitter.
How to carve a pumpkin
1. Pick your pumpkin
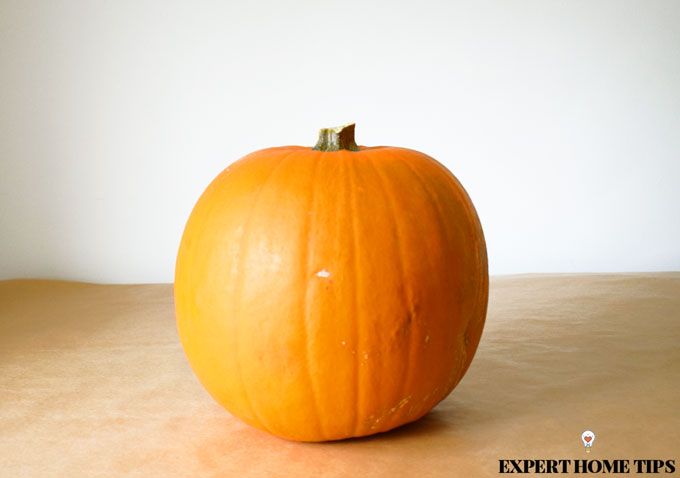
When it comes to choosing your pumpkin, there are a few things to consider.
- Freshness is key - Picking the best produce can be a challenge even during the weekly shop. To ensure your pumpkin is going to last, pick one with a thick, green stem. You don't want there to be any soft areas on the body of the pumpkin, as this is a sign of early rot. Pick up your pumpkin no sooner than a week before Halloween.
- What size do you need it to be? Smaller pumpkins will be more fiddly to carve, but large pumpkins will take more time to hollow out and will have a thicker body. Mini pumpkins are perfect for adding details or for cosy home decor. How about adding a couple of mini pumpkins to a large one for a beautiful pumpkin carriage?
- Will imperfections impact your design? Can you see the beauty in an imperfect pumpkin? Maybe a green patch would make the perfect skin for a zombie?
- Where will you buy it? Most supermarkets will bring out pumpkins from the start of October. For a family day out, why not go pick our own? Find a pumpkin patch near you.
2. Get set up
Pumpkin carving is serious business. Done properly, it'll take a good hour. For minimal mess and easy cleanup, you'll want to make sure you've set up a proper workstation.
You'll need a sturdy and smooth surface to work on, preferably with a comfortable chair. Begin by covering your area with newspaper, kraft paper or a disposable tablecloth to keep all that pulp from staining surfaces.
3. Gather your supplies
For successful pumpkin carving, you'll need:
- A Pumpkin - ideally medium to large in size.
- Carving tools - Pumpkin carving kits are cheap and safer than kitchen knives. If you're using kitchen tools, opt for serrated edges to avoid nasty cuts.
- Kitchen roll - You'll need something to clean your hands with!
- A couple of medium-sized bowls - for separating the seeds and pumpkin flesh.
- A spoon or scoop - This will help you to remove the pumpkin's innards.
- Stencils - If you intend on using a stencil, you'll need a printer, paper, sellotape and a sharp tool to trace out your design with. We'd recommend a toothpick.
- A pen - for freehanding designs.
- A candle - to light up your pumpkin.
3. Cut off the lid
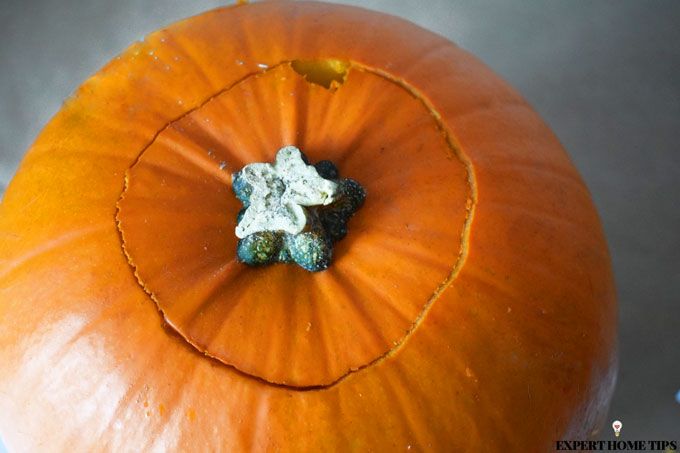
In order to scoop out the pumpkin's guts, you'll need to cut an entrance hole big enough to get your hands and tools inside.
For a classic pumpkin, you can cut a round circle in the top, but be sure to cut at a 45-degree angle so that the lid will sit perfectly. If you cut down vertically, the lid could end up falling through.
For a sturdier lid and easier access, you can cut straight along the top of the pumpkin, removing "the crown". Just be wary that cutting lower down may interfere with your design.
Some professional carvers would say that cutting around the stem is a bad idea as it'll weaken the structure and starve the pumpkin of nutrients. Instead of removing the top, you could cut a hole in the back.
TOP TIP: If you want to illuminate your pumpkin with a real candle, you might want to cut out a small notch to allow heat to rise out of the top - a bit like a chimney!
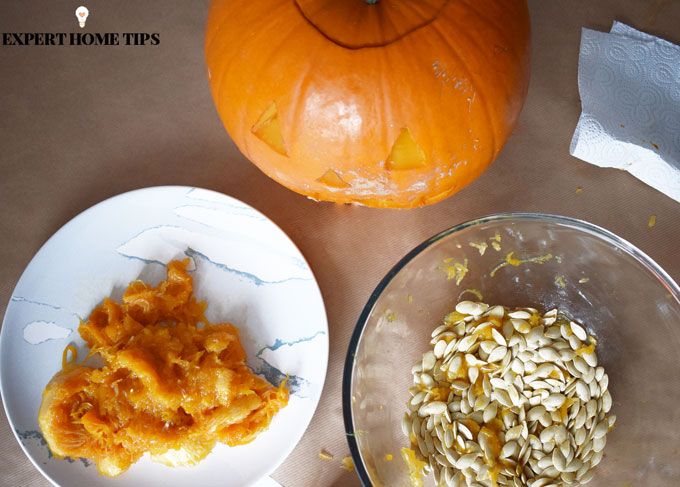
4. Hollow it out
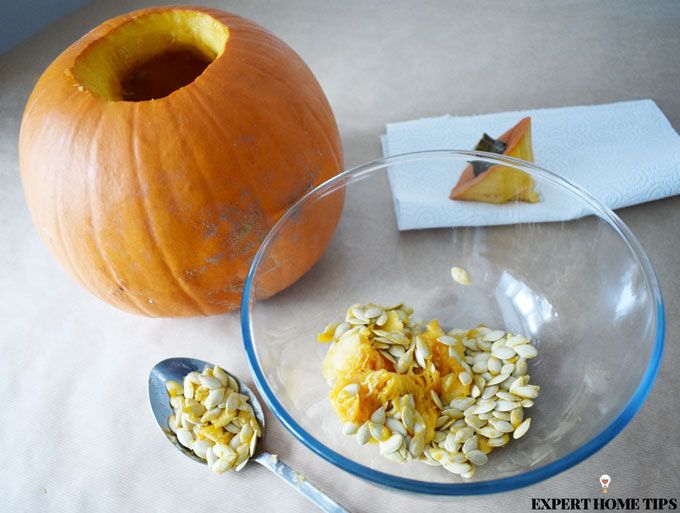
Now for the messy part. If you're involving the kids, this is a step they can get involved with.
Remove all of the seeds and stringy flesh from the inside of the pumpkin. This can be really challenging because the seeds are slimy and held firmly in place by the strings of pumpkin - you'll need a bit of patience.
For this step, you could wear rubber gloves and use a spoon or an ice cream scoop, but we find that bare hands are best. The scooping tool that comes in carving kits is ideal for dislodging seeds and pulp.
For easy cleanup, put the insides into a bowl. You could put the seeds and flesh into separate bowls if you want to roast the seeds.
Read on to discover our easy roasted pumpkin seed recipe.
5. Scrape down the inside
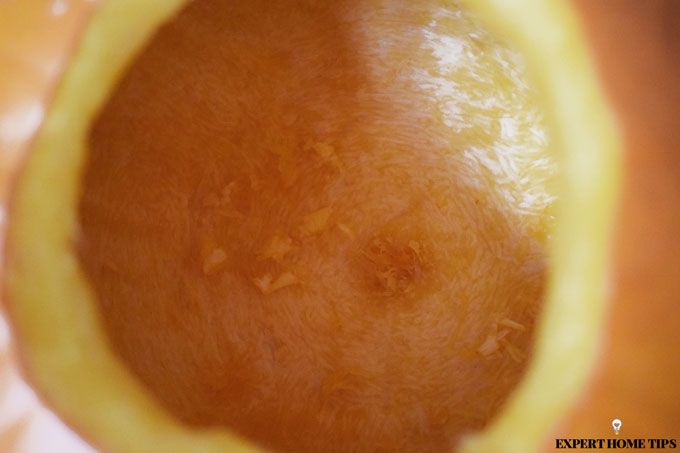
Once you've removed the pulp and seeds, you should scrape down the inside walls to remove any excess flesh. This will also help to thin out the walls of the pumpkin, allowing light to shine through better.
6. Wipe clean
Use a piece of kitchen roll to wipe off any mess on the outside of the pumpkin. Any excess sludge could make carving a lot trickier!
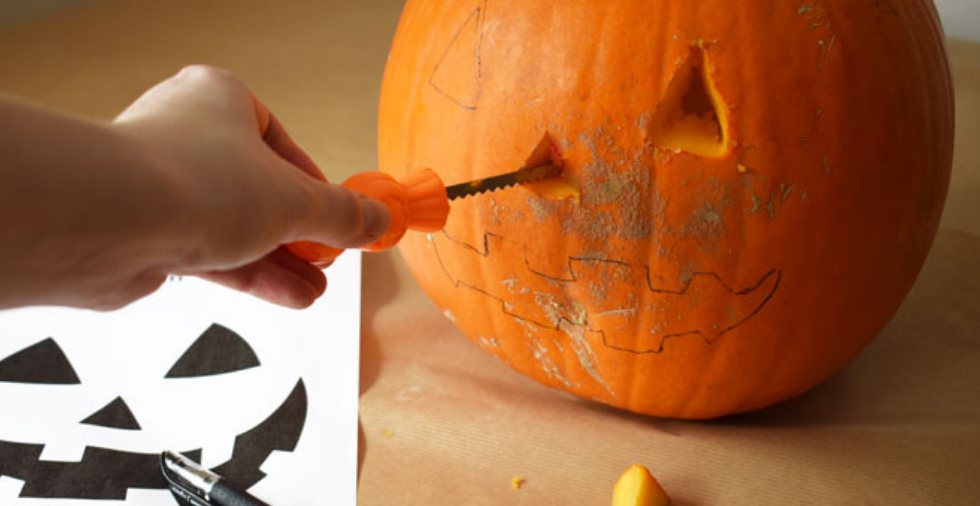
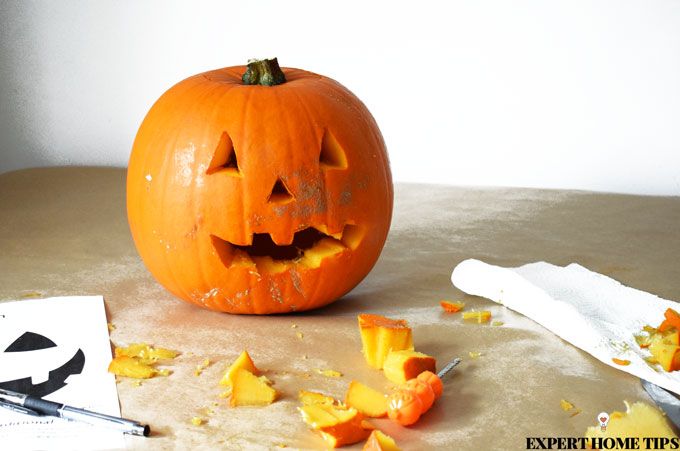
7. Draw on your design
Even the most basic design could do with some planning. Use a pen to draw a design onto your pumpkin.
If you've found a stencil that you'd like to use, sellotape it into place and use a sharp tool to trace around the edges. We'd recommend using a pushpin to make small dots in the pumpkin's skin.
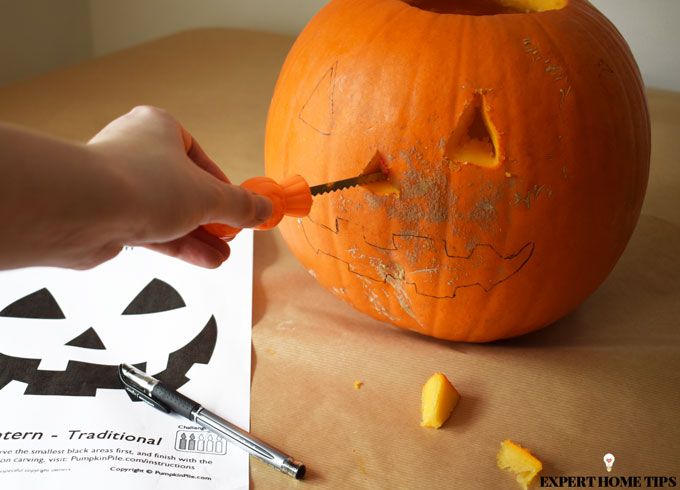
6. Carving

As you carve, the structure will weaken, so it's best to start in the middle and work outwards. Use a serrated knife or carving tool in small movements.
Don't worry if a piece of your design falls off. Just use toothpicks to hold it back in place.
TOP TIP: If you're not a fan of the pumpkin smell, sprinkle some cinnamon on the inside of the pumpkin, especially the lid, to mask it.
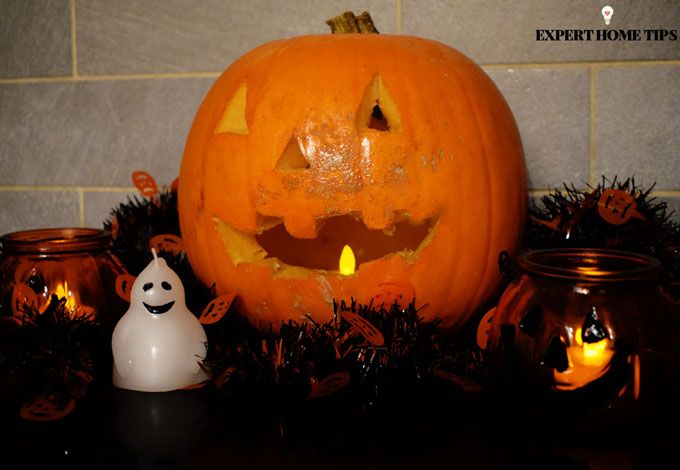
7. Light it up!
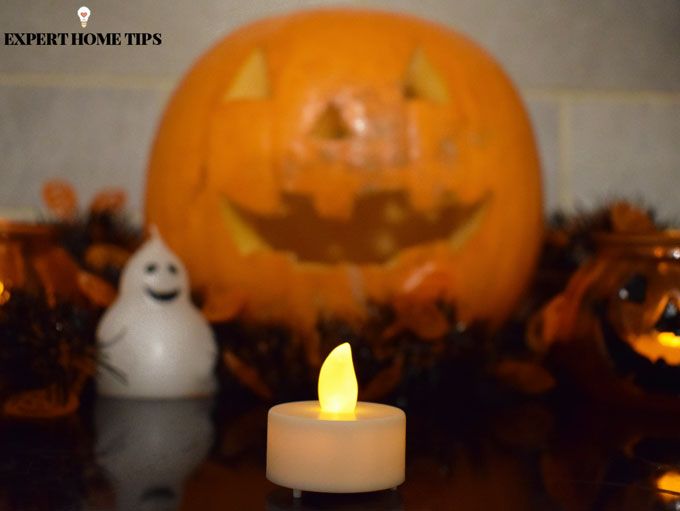
For an old-school pumpkin, pop a tea light into a small glass or jar. Place the glass inside the pumpkin. Be sure to cut a notch for heat to escape from, or leave the lid off altogether.
If you want peace of mind, there are a few safer alternatives. Perhaps you could bundle up a string of battery-operated fairy lights or use a flameless candle? We love the idea of using a bicycle light. It'll give off a red glow and can be put on a sinister, flashing setting.
TOP TIP: to have more light shine through certain areas, peel off a layer of the outer skin. It'll give a professional, translucent appearance.
8. Preserving your pumpkin
Unfortunately, pumpkins don't stick around for very long, but there are a few things you can do to keep your pumpkin looking fresh:
- Rub the cut-out sections with vaseline.
- Spray on a solution of diluted lemon juice.
- Spray with a bleach-based cleaning product.
- Store in the fridge when not needed on display.
If you do use any of the chemical-based methods, be aware that your pumpkin will not be suitable for wildlife to enjoy after use.
See how we did it:
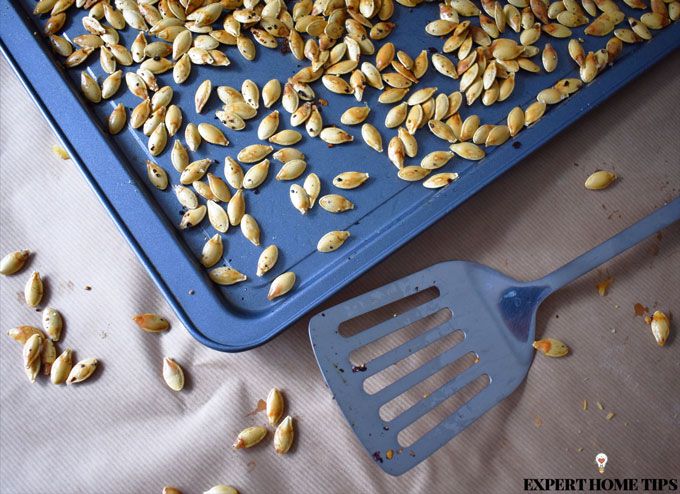
Roasted pumpkin seed recipe
Throwing all of those pumpkin seeds away seems such a waste, especially when they can be so delicious and nutritious! Try roasting them instead for a tasty treat...
1. Preheat
Get your oven heating up to 180°C/350°F/gas 4.
2. Separate the seeds
If you haven't already, you should separate out the seeds from the pumpkin flesh. You might want to use the flesh for another recipe.
3. Rinse
Place seeds into a colander and rinse off any remaining pulp.
5. Shake
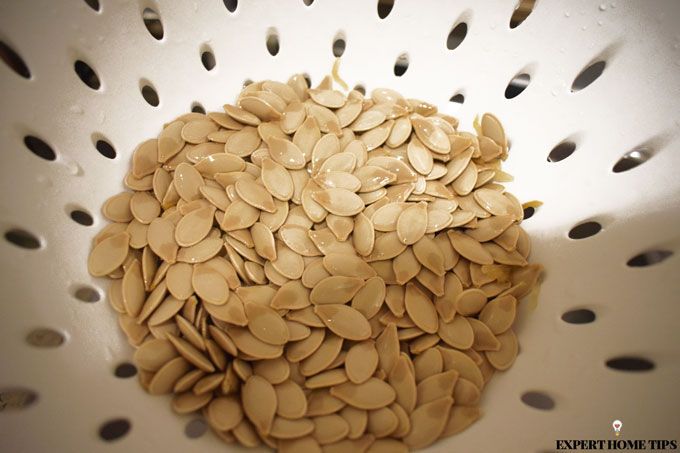
Shake the seeds inside the colander to remove any excess water. Don't pat dry with a paper towel, because they'll just stick to it.
6. Prep seeds
Drizzle a little olive oil onto a baking tray and pour on the seeds. Add seasoning to the seeds. We used salt, pepper and chilli flakes for ours.
Toss the seeds to coat with the oil and seasonings.
7. Roast
Roast in the oven for 15 minutes, or until golden brown.
8. Leave to cool
Enjoy as a healthy snack!
Let us know if you have any pumpkin carving tips or recipes to share!

Leave a Reply