

- Getting started: The basics of chalk paint
- How to make chalk paint waterproof
- How to make pavement chalk paint for outdoor fun
Are you ready to infuse new life into your old furniture, unleash your inner artist, or engage your kids in a creative outdoor activity? Look no further – making your own chalk paint is a fantastic and cost-effective way to achieve stunning results. Whether you've seen this fad on Instagram or watched it on a home design show, we've got you covered here.
In this comprehensive guide, we'll walk you through the steps of crafting chalk paint from scratch, whether you're aiming for a smooth furniture finish or pavement masterpieces with your little ones. So, roll up your sleeves and dive into the world of DIY chalk paint!
Getting started: The basics of chalk paint
Chalk paint has gained widespread recognition for its exceptional versatility, elegant matte finish, and distinctive textured appearance. What adds to its uniqueness is the sheer convenience of crafting this paint within the confines of your own home, utilising easily accessible ingredients that await your artistic touch. It's a great home improvement hack!
To start this creative journey, let's delve into our recipe that will set the stage for your chalk paint endeavours. First, we need to take a quick look at the things you need.
Ingredients you will need:
- Acrylic paint (colour of your choice)
- Unsanded grout or plaster of Paris (for a smoother finish)
- Water
- Mixing container (plastic or glass)
- Measuring spoons
- Stirring stick
Step 1: Mixing the chalk paint
The first step in this process is mixing your chalk paint. Don't worry — this doesn't take too long at all. Here's what you need to know.
- Choose your base: Start by selecting your acrylic paint colour. It is where you can let your creativity shine – whether you're going for bold and vibrant or subtle and pastel, the choice is yours.
- Adding the chalky element: Add unsanded grout or plaster of Paris to your acrylic paint for a more authentic chalky texture. Use approximately one tablespoon of grout or plaster for every cup of paint. Adjust the ratio based on your desired finish – more grout or plaster will result in a smoother texture.
- Blending the mixture: Gradually add water to your paint mixture while stirring continuously. Aim for a consistency similar to pancake batter – not too thick, but not overly runny. Achieving this optimal texture will ensure your chalk paint flows effortlessly onto your chosen canvas.
Step 2: Applying the chalk
Now that you've successfully concocted your chalk paint, it's time to apply it to your chosen surface. Here's what you should do.
- Prepare your surface: Ensure your furniture piece or canvas is clean and dry. Before you begin, wipe your surface with a damp cloth to remove any dust, dirt, or lingering residues. Cleaning it thoroughly helps the paint adhere better and ensures that your final masterpiece will shine bright without any unwanted blemishes.
For furniture, lightly sand any rough spots to create a smooth base for the paint. Grab a fine-grit sandpaper and gently rub it over any areas that feel a bit uneven or coarse to the touch. This quick step might seem small, but it makes a big difference in providing an even surface for the paint to grip onto.
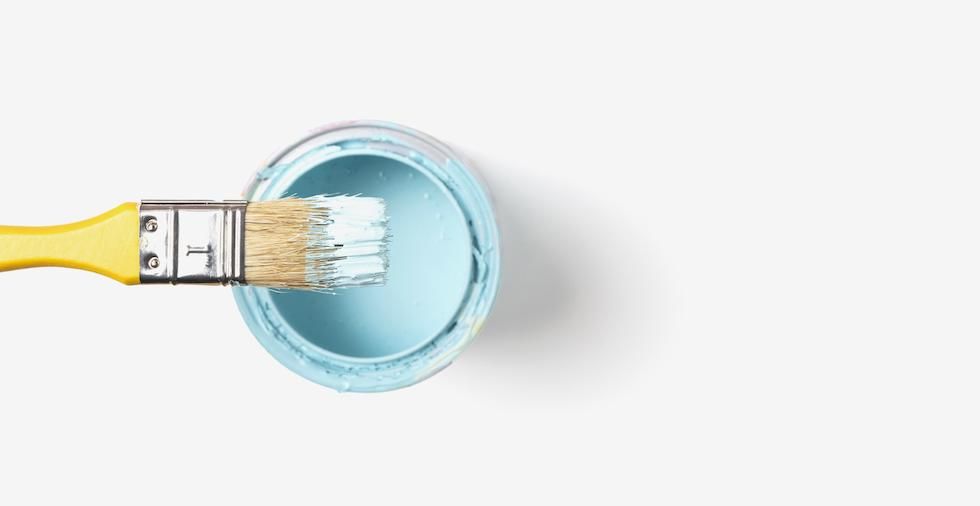
- Start Painting: Use a brush to apply the chalk paint evenly. Chalk paint has a friendly nature that sticks nicely to various surfaces, be it wood, metal, or even fabric. As you paint, remember that even strokes ensure a consistent and polished look, allowing your creative flair to shine through.
Apply two to three coats for furniture, allowing each coat to dry before adding the next. Patience is your ally here – giving each coat time to dry before applying the next ensures that your paint job will look professionally done.
- Distressing (Optional): To achieve a distressed, vintage look, gently sand the edges and corners of your painted furniture piece after the paint has dried. This step adds a touch of character and history to your creation as if it's been through the hands of time. Using fine-grit sandpaper, lightly sand areas that naturally experience wear and tear over the years – like edges, corners, and raised details.
Step 3: Add the finishing touches
By this point, you have made your chalk paint and painted your items. However, there's one last thing you might want to do. Here's how you can add some finishing touches.
- Sealing the deal: Apply a clear wax or glaze to protect your painted creation. This step adds a layer of protection and enhances the paint's finish. Allow the wax or glaze to dry according to the manufacturer's instructions.
- Adding glitter (optional): For a touch of glamour, mix fine glitter into your chalk paint before application. This simple yet enchanting technique allows you to infuse your creations with radiance, turning ordinary pieces into extraordinary works of art. It works particularly well for decorative pieces and art projects.
How to make chalk paint waterproof
Make your chalk paint waterproof for outdoor projects exposed to moisture by incorporating a waterproofing additive. This clever technique preserves your creations' vibrancy in rain or humidity.
Start by choosing the right additive, available at local craft or hardware stores. Mix the additive with your chalk paint according to the recommended ratio, ensuring a thorough blend.
After testing the mixture, apply it evenly to your chosen surface using a brush or roller. Once dried, the waterproofed chalk paint forms a protective barrier, allowing your outdoor masterpiece to endure various elements and maintain its allure over time.
Before you get started on this project, learn how to clean outdoor furniture. Preparing your surfaces is key!
How to make pavement chalk paint for outdoor fun
Looking for a new way to keep the kids entertained? Engage them in delightful and imaginative outdoor activities by delving into the world of homemade outdoor chalk paint, crafted using a simple yet captivating recipe that involves using flour. Mixing common household ingredients, you can concoct a washable, eco-friendly paint that transforms pavements into vibrant canvases through messy play. It's one of our favourite uses for cornflour!
Ingredients:
- Cornstarch
- Water
- Food colouring or washable tempera paint
How to mix it:
- Gather ingredients: Assemble your ingredients – cornstarch and water – and prepare to embark on a colourful journey of outdoor artistry.
- Creating the base: In a mixing bowl, combine equal parts cornstarch and water. For instance, if you use 1 cup of cornstarch, pair it with 1 cup of water. The fusion of these elements will gradually form a smooth and luscious paste, ready to transform the pavement into a canvas of imagination.
- Vibrant colour infusion: Add a few drops of food colouring or washable tempera paint to breathe life into your chalk paint. Start with a few drops and gradually increase if desired, stirring the mixture thoroughly. Watch as the colours meld and dance, promising to lend vibrancy to every brushstroke.
How to apply it:
- Use paintbrushes, sponges, or even your hands to apply the outdoor chalk paint to your driveway or pavement.
- Watch your kids create colourful masterpieces that wash away with water when ready for a clean canvas. It's a super fun way to keep kids busy!
Whether transforming furniture, adding a chalkboard finish to your kitchen, or creating art with your kids, making your own chalk paint offers endless possibilities. Experiment with different colours, textures, and techniques to achieve the desired effect. From shabby chic to modern elegance, chalk paint is a versatile DIY solution that opens the door to a world of creativity and self-expression. So grab your ingredients, and let your imagination run wild as you embark on your chalk paint journey!
Q&A
Looking for some more information on how to make chalk paint? Check out our frequently asked questions below.
Can chalk paint be made?
The short answer is yes. You can make chalk paint at home by following the guide we have shared here. Moreover, you don't have to be an expert crafter to get it right.
What are the disadvantages of chalk paint?
Chalk paint can cost more than regular paint. If you want to save money, it may be worth learning to make chalk paint from scratch.
How many years does chalk paint last?
According to The Spruce, you can expect chalk paint to last between one and five years. How long your paint lasts will often depend on the quality of the materials you use.
What makes chalk paint so great?
Chalk paint is popular as it works on most surfaces and gives an excellent matte finish. While it has been around since the 19th Century, chalk paint is soaring in popularity.
Will you give this creative craft a try? Let us know in the comments below!

Can I make and use chalk paint for use on cards? I know I can make my own texture paste but is chalk paint the?? If possible could you please do a wee post on craft pastes for use at home?? Thank you again for all your posts, I love reading them all.
Thanks so much, we're really glad you're enjoying the posts! Homemade chalk paint is generally intended for furniture rather than card, but a post on homemade craft pastes is a great idea, and we'll add it to our list.