- How does washing machine mould occur?
- What do I need to prevent mould in my washing machine?
- How to clean a mouldy washing machine
Editor's Note: This post was originally posted in November 2016 and has been completely revamped and updated for accuracy and comprehensiveness in June 2025.
Have you ever opened your washing machine door and been hit with a nasty smell? Or maybe you've noticed your clothes aren't as fresh and clean as they should be?
Don't worry! Today, we're showing you how to clean a front-loading washing machine quickly and easily using natural cleaning products you already have at home.
How does washing machine mould occur?
We all use our washing machines regularly, but how often do you clean yours? Front-loading washing machines are prone to buildups of mould, mildew, detergent residue, and limescale, particularly around the rubber door seal and detergent drawer. It's the leading cause of that musty smell in your washing machine, so you need to learn how to keep on top of it. The good news is that we'll show you how to get rid of it with our expert deep cleaning and detailing tips.
We don't want to cause panic here, but according to GOV.UK, all moulds have the potential to cause ill health and can even be fatal in extreme cases. So, cleaning our washing machines suddenly becomes a bigger priority than we all initially thought.
What do I need to prevent mould in my washing machine?
Today, we're sharing the perfect way for you to clean your washing machine. It's strange, but it's simple: White vinegar, baking soda and washing-up liquid - that's all!
This eco-friendly method doesn't use bleach or other nasty chemicals, only costs pennies to make, and you most likely already have the ingredients in your kitchen, so no excuses!
How to clean a mouldy washing machine
Great news! You can clean your mouldy washing machine in under an hour, and it's super simple.
Here's what you need:
- White vinegar
- Baking soda
- Washing-up liquid
Tools:
- Empty spray bottle
- Cleaning cloth
- Old toothbrush
- Towel
- Tray
Method:
1. Clean the rubber door seal
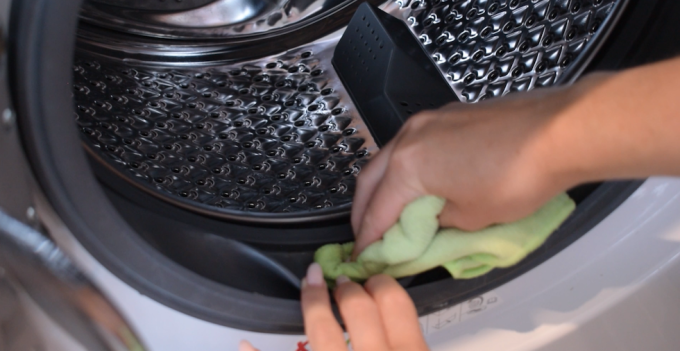
Gently pull back the rubber gasket and you'll likely find a mix of lint, grime and possibly black mould. Start with a quick wipe using a microfibre cloth and some white vinegar, which is a natural antibacterial cleaner. Removing the dust and fluff now makes the next step work that little bit better.
2. Clean the washing machine drum
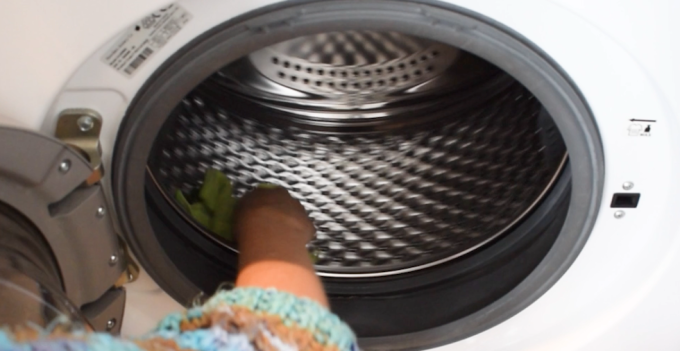
First, make sure your machine is empty. We're going to run a hot cycle with our favourite natural cleaning products - white vinegar and baking soda.
In a small bowl, mix ¼ cup of baking soda with ¼ cup of water and pour this into the detergent drawer. You can put a little in each compartment. Baking soda is a fantastic cleaner. You'll find more ways to use it in our other article.
After that, pour 2 cups of white vinegar directly into the drum. Run your machine on the hottest cycle to kill as much mould and bacteria as possible and eliminate odours. Ideally, this would be 90 degrees to help kill mould and boost the vinegar's cleaning power. Vinegar acts as a natural limescale remover, which is excellent news for those living in areas with hard water. Hit start and let the machine do all the hard work!
If you love natural cleaning as much as we do, check out our article on all the ways to use vinegar around your home.
3. Clean the outside of the machine
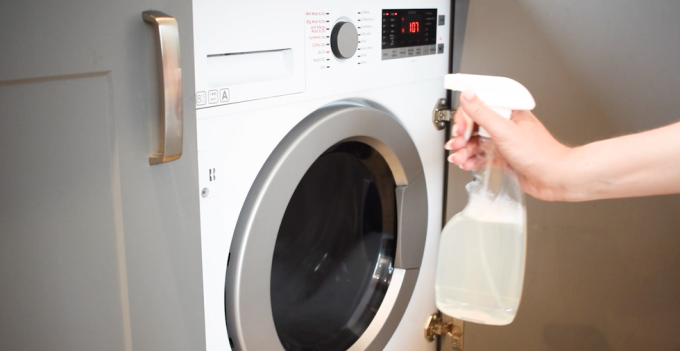
Start by making a simple DIY cleaning spray. Mix 1 cup of white vinegar, 1 cup of warm water and a teaspoon of washing-up liquid in a spray bottle. Spray this solution onto the exterior of your machine and let it sit for a minute or two. Wipe away any grime using a cloth or kitchen roll. This natural cleaning spray is safe and effective, and we'll be using it for the rest of the deep clean.
4. Scrub the gasket seal
Once the cycle finishes, and while the machine is still warm and damp, use a clean cloth to dry the drum and glass door.
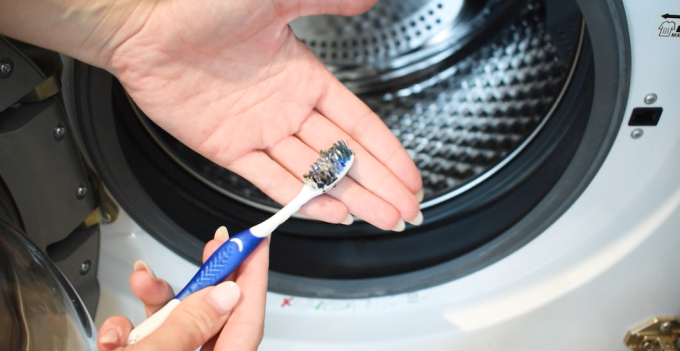
Now go back to the rubber seal. Gently pull it back and scrub thoroughly with a sponge and old toothbrush to get into all the nooks and crannies. Use the vinegar-based cleaning spray you made earlier and spritz it generously onto the seal. Let it sit for 10 minutes, then scrub again. Once you've dislodged the grime, rinse and wipe down with a microfibre cloth.
If stains remain, you can switch to a mould and mildew spray cleaner (just make sure all vinegar residue is wiped away first, as vinegar and bleach should never mix). For extra stubborn spots, try a mould-removing gel and follow the instructions on the packaging.
5. Clean the detergent drawer
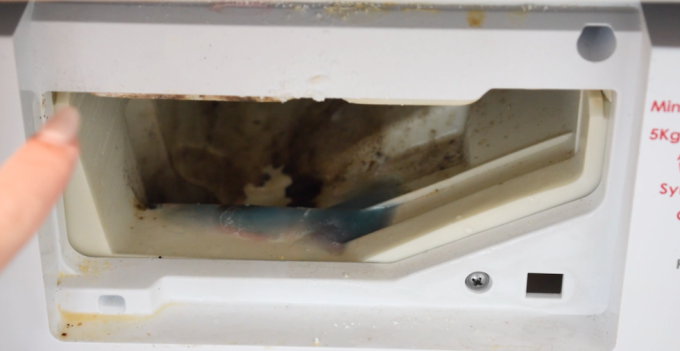
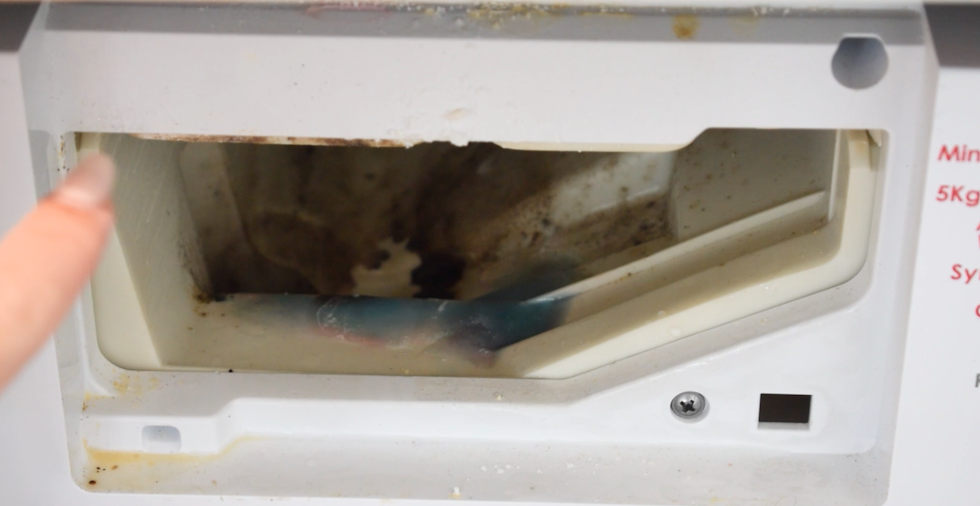
Carefully remove the drawer, and you'll see just how dirty these can get. Bring it over to your sink and fill the compartments with white vinegar. Let it soak for a few minutes.
While the vinegar is doing its magic, this is a great time to check out something fun we do every month! We run exclusive competitions on our website, with some fantastic prizes. It only takes a second to enter, and you might be one of our lucky winners!
After that, rinse and soak the drawer in warm, soapy water. Use your toothbrush to scrub all the little crevices. The residue buildup can build up in the drawer over time, so it's important to keep it clean. Lastly, don't forget to clean the chute where the drawer slides in. Spray the DIY mix from earlier and leave it for 10 minutes. Scrub it and wipe clean.
6. Clean the washing machine filter
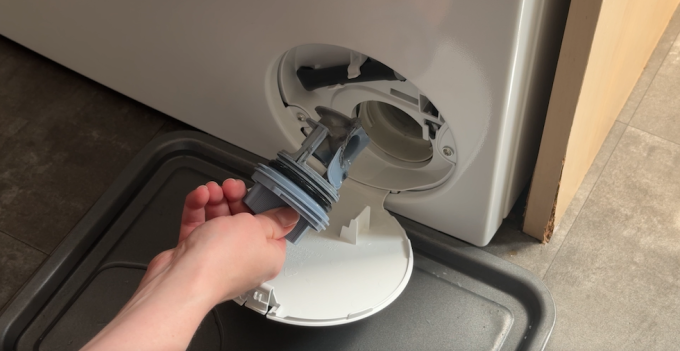
Most washing machines will have this lower panel at the front. Your machine may be different, so please refer to the manual for specific details.
Before you open the door, place an old towel or a tray underneath to catch any excess water. Open the door and remove the filter. You can rinse it in the sink. Next, spray the filter with the vinegar solution and use the toothbrush to scrub away any buildup. Rinse and reinsert, making sure it's secure.
If you thought that was grimy, you should see what's in your dishwasher. Watch our step-by-step video on how to deep clean that, too.
To keep your washing machine fresh and clean, follow these simple tips:
- Remove clothes right after the wash ends.
- Wipe the drum, door, and rubber seal dry after every use.
- Leave the door and drawer open to allow airflow. You can use one of these handy magnetic tools if the door tends to close by itself. We've linked to the shop below.
- Run a hot cleaning cycle once a month with vinegar or a washing machine cleaner.
- Wipe the drum after washing heavily soiled items.
- Use less detergent to avoid residue buildup.
If you're looking for advice on how to do laundry, we've got an article helping you avoid common mistakes. Be sure to head there next.
And there you have it! That wasn't so hard. Your washing machine is clean, fresh-smelling and ready for action. And all without using any harsh chemicals or expensive specialist cleaners.
If you followed along, let us know in the comments how your machine looks now! And if you have your own laundry hacks or washing machine cleaning tips, we'd love to hear them.
If your machine isn't coming up clean, it might be time for a replacement. Learn how to disconnect a washing machine next. Or, in the meantime, why not give hand-washing your clothes a try? For more cleaning tips, read our tips on removing black mould.
Q&A
What is the best thing to clean a washing machine with?
We love using a cloth and an old toothbrush to get into all the crevices.
How do you clean a smelly washing machine?
If your machine is particularly smelly, ensure you've given the drum, dispenser, and rubber seals a thorough clean. Regular maintenance and leaving the door open between washes will help to keep odours at bay.
Can you use a dishwasher tablet to clean a washing machine?
Using a dishwasher tablet to clean a washing machine is not recommended. Although some people have had success with this method, it's safer to use gned for washing machine cleaning.
Can Zoflora clean a washing machine?
You can use Zoflora to clean the exterior of the washing machine. Soak a cloth in a solution of 1 capful of Zoflora mixed with 400ml of warm water. You can also use Zoflora to manage odours coming from inside the machine. Add 2 capfuls to the empty drum and run a hot cycle.
Is bleach or vinegar better to clean a washing machine?
Choosing between bleach and vinegar depends on the issue you're tackling. Vinegar is better for odours, while bleach is suited to tackling mould. Never mix the two.
Where do you put white vinegar in a washing machine?
White vinegar can be added to the fabric softener section of the dispenser drawer or into the drum.
Thanks for reading. We hope this article helps you remove washing machine mould and keep your clothes clean and fresh! If you have any tips of your own, please share them in the comments below.
To prevent black mould forming in the detergent tray simply wash with sterilising fluid eg. Milton
Great tip, thanks Jo! x
This sounds really good. Thanks for the tips. I am going to try it and let you know how it goes!
Thanks for reading, Jackie. Yes, please me know how it goes. I was shocked to see the results! x
Hi Collette, I've just read your article re washing machine mould, and it's really frightening. but I do clean my machine with a dettol product once a month although it is much more expensive than your method, but I will try it so thanks. Shirley.
Hi Shirley, thanks for reading. It is quite shocking to think that mould is building up in there! Dettol is super expensive so yes, give it a go and let me know what you think. Thanks again, Collette x
Hi I do this and it works fantastic! Am glad Thank you
Fabulous! Glad it helped :) x
Hi Collette, my rubber door seal when viewed with the door shut shows really bad black stains at the bottom. I find it embarrassing when friends call around. Would it be okay to use the scourer with detergent to clean it, the scourer wouldn't damage the rubber or would it?
Hi Emma, I used it on mine and it turned out great, I would try a small area first just to check :) I hope this helps! Thanks for reading x
I wouldn't use a scouring pad on the rubber seal, or anything metal for that matter, particularly if it's the Brillo pad metal wool type of scourer. I cleaned the inside of the seal on my machine by filling it with vinegar soaked cotton wool (use the roll type not balls) and leaving it for 24 hours. Then put four dishwasher tablets on the hottest wash (remove the cotton wool first!) . Use the cheapest vinegar you can find - the more "acidy" the better and also cheap dishwasher tablets work just as well as expensive ones. It will still need a bit of elbow grease if it's built up over time, but once done it's easy to maintain. Always keep a special cloth by the machine to wipe the inside of the seal after use and remember to wash that weekly too. If it's nearby you're more likely to actually use it And if you make it out of a pretty fabric, even better. To the lady who uses dettol - please be very careful if you have pets as dettol and similar type products are dangerous, especially for cats. Even if they just walk on dried floors you have used it on it can cause serious illnesses long term.
Thanks for sharing Julie, great tips!
I think you are forgetting the dispenser draw, I remove the draw at least monthly and if you look inside where the water comes in you will see slimy black mould around the water filler outlets, which is very hard to reach, I use an old tooth brush and a bottle brush with some sterilising solution mixed with washing liquid any sort will do and scrub away until all of the slimy mould has gone, you will be surprised how mucky the water outlets get and that's where the smell comes from, I then clean the Dispenser draw and give that a good going over with the sterilising mixture cleaning it in the sink, then rinsing it clean before replacing it, I then put the washing machine on a rinse cycle first to get rid of any muck that has dropped down into the machine, and them I put it on a hot wash empty with some washing powder/liquid and a good old squirt of sterilising solution, I don't use bleach it is a cheaper version of Milton which you can purchase in the pound shops or in home bargains, it works well on the rubber seal to no need to scrub to much As even if it is stained YOU WILL KNOW IT IS CLEAN,! Works on a dish washer too!
Hi Anne. The dispenser draw can get quite dirty, so you are right to mention it. Your method involving a toothbrush and bottle brush sounds like a great idea - thanks a lot for sharing it with us. :)
I always had a problem getting the detergent dispenser clean - not the drawer itself which pulls right out but the surrounds where the water comes out of little holes into the drawer which were getting so bunged up with mould that the water was not coming through properly. After trying many different cleaning products on this and banging my knuckles trying to get my hand in with a toothbrush to scrub, I had a go with diluted white vinegar in a spray - magic!! Hey presto, all the mould gone!! However, I will try adding some baking soda to the vinegar solution next time to see if that works even better.
Hi Michele. Vinegar is a surprisingly effective solution for many cleaning problems. It's great to hear it worked for you! Thanks a lot for sharing :)
Rubber gasket on top is gross. How to clean it?
Hello Bea! We'd suggest using a cleaning cloth and hot soapy water to get it looking good as new. You could also try a mildew remover if that doesn't work.
you MUST wear a mask while scrubbing! not a funny mask - this is not a carnival : )
Very true!
I tried the vinegar and baking soda method outlined by the author and unfortunately, despite the machine being less than 3 years old, the mold seems totally ingrained and didn't come off. I also tried Julie's suggestion of vinegar wool soaked overnight in the rubber seals nd then dishwasher tablet and a good bit of elbow grease, but that made no difference. I guess I'm stuck with the moldy rubber......?
Sorry to hear that, Bryce! Sometimes things are beyond saving...
the washing machine drum has mildew and its smelly. How do I fix it?
Hi there! Have you tried the tips in this article?
Dealing with sticky black flecks a few weeks. Just now they covered the clean clothes ?. Looked up found this site and am running an extra hot normal little ad now. Wiped down bleach dispenser and soap dispenser first and rim of tub with warm water/ white vinegar. Fingers crossed.
Hope it helps!
I have a Whirlpool washer that is now 20 years old, the only thing we have had done in all that time is a new pump. I have never had a problem with smell/mould. The secret I believe is I always leave the door open after use and once a month put a commercial washing machine cleaner through it on a very hot cycle. You don’t have to buy the Dettol cleaner as there are many cheaper ones to be had.
That's great to hear! 20 years is impressive.
Having trouble cleaning the hole in the dispenser drawer? if you have reusable straws then the brush works a treat! If you don't then pipe cleaners are really good for getting into awkward spots. Get them in pound shops.
That's a great idea!
I keep an old towel on top of the machine and after every wash, I dry the door and down into the seal. The door is left ajar all the time, so far, no mould or funny smells.
That's a great hack!