

Do you want your garden to be the envy of the neighbourhood? If your outside space looks less than attractive, there's a quick hack you might not have tried — winter sowing.
Yes, if you want to give your garden a head start this springtime, you need to get moving. In the following guide, we will look at how to winter sow seeds the right way.
What is winter sowing?
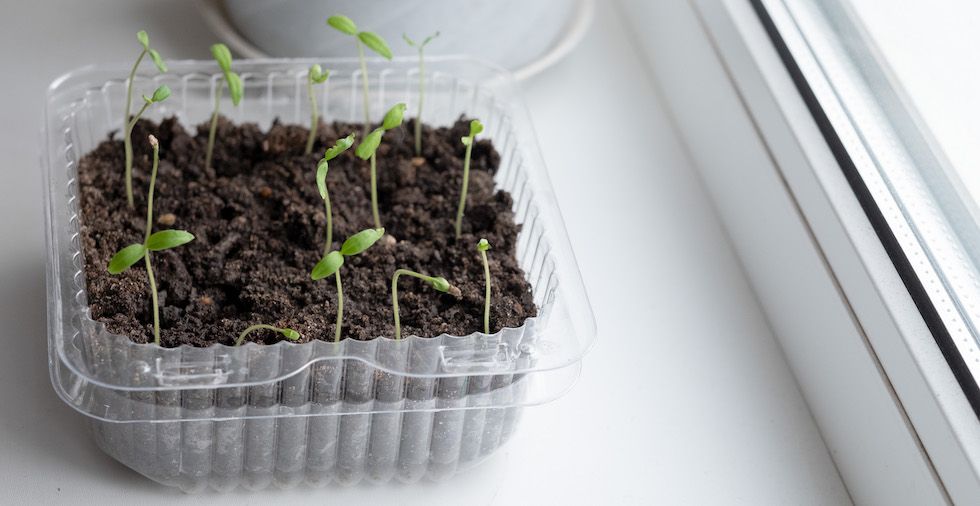
Winter sowing is a simple way to plant seeds during the colder months. You can still start gardening projects when the weather is grey outside. Using sealed containers, you can plant all the seeds you want to grow when spring comes around. This process is easy for anybody to follow and achieves luscious green results.
When to start winter sowing
In this article, we will take you through the process of how to winter sow. However, you first need to know when to do it. Be selective about when you begin planting. As a golden rule, you should start your winter sowing project between December and late March. That way, the seedlings will have a chance to grow ahead of the warmer springtime months.
How to winter sow: 8 simple steps
Ready to get started with your winter sowing project? We've got you covered. You will need to gather your supplies before trying this for yourself. For the following tutorial, you will need some winter sowing seeds, plastic containers, high-quality soil, scissors, and water.
Step 1: Pick your containers
Before starting winter sowing, you need to choose your containers. But don't worry — you don't have to go out and buy any fancy planters for this job. Instead, you can look in your recycling bin and see which plastic containers fit the bill here.
You will need a whole range of different containers for your winter sowing. Look for some long bottles, more shallow containers, and other shapes. The more variation that you have here, the more things you will be able to do. Think outside of the box. You could use an egg carton for your seedlings, but you'll need to cover it with clingfilm or a plastic container to create a greenhouse effect.
Step 2: Prepare your containers
Now that you have a selection of containers, the next step is to prepare them. This is a super quick DIY project that shouldn't cause you much trouble. First, you should poke holes in the bottom of each of them — so that water can drain through them. You also need to cut them in half. For example, with a milk bottle, use a pair of strong scissors to get started cutting the circumference of the bottle, so there are two pieces.
The containers will act as mini-greenhouses, i.e. the top will also be covered with the other half of the container. Therefore, you need to poke some small holes in the top of the container. Then, you will slot the two parts together when you have planted the seeds in the soil.
Step 3: Get some quality soil
Before starting the third step, ensure you have some high-quality soil. The better the soil you use, the better your chances here. Fill the bottom of each container between three and four inches of the soil. Then, you should pat it down.
Check the condition of the soil before you start winter sowing. For example, you'll want to liven it up if it feels dry and crusty. Next, water the soil lightly so that it is moist. Once you have done that, you will find the soil ready to plant your seeds.
Step 4: Plant your seeds
Now that you have adequately prepared your mini greenhouses, you can get to the fun stuff: planting. You can use both vegetable and flower seeds when you are winter sowing. Be sparse about how many seeds you put in each container. If each seed does not have enough space to grow, it may become stunted and die before it has had a chance.
When you are planting your seeds in the container, make sure that you space them out. This is good for the plant's health, but replanting the seedlings later in the year will be easy. So it's always worth planning here!
Step 5: Water your soil
Once you have planted your seeds, the next step is to water each container. First, pop them in the sink (so that you don't make too much of a mess!) and then give each of them a liberal amount of water. Unless you want to clean your floors, you should allow the containers to drain entirely before trying to move any outside.
Step 6: Seal your containers
You've done all the hard work — the final step is to seal your containers. That means putting the two sides of the container back together. If you are savvy with slotting them together, you may not need to use anything else. However, you will need extra reinforcement if you can't manipulate the container to go inside the other side.
You can use some duct tape to get the job done. Make sure that the container is fully sealed before you move them. It is worth labelling each container to make things easier for you in the springtime. You don't have to guess what they are when replanting.
Step 7: Move the containers outside
Your mini greenhouses are complete so you can move the containers outside. Find a spot where they won't be disturbed by pesky cats or other critters. You want to ensure they get enough sunlight wherever they are in the garden space.
Step 8: Replant them in the spring
Once you've done all of the above, you don't have to do anything else. You can leave your winter sowing containers in your garden until the weather picks up in the spring. When that happens, you should replant each seedling in your garden. You should find that they begin to flourish since the plants have had a head start.
Top tips for winter sowing
You already know the entire winter sowing process… so what happens next? Before planting your seeds, some tips will help you along the way. Whether you have naturally green fingers or you're new to the whole gardening thing, try these:
Invest in high-quality soil
There's no room for scrimping and saving here! If you don't get high-quality soil, you are not giving your plants the best chance of survival. When you're picking the soil to use for winter sowing, it pays to be picky. Using dirt means that you don't know what's in it. There may be the roots of old plants, weeds, and everything in between there!
Choose sturdy containers
Picking the proper containers also plays a role here. For example, two-litre plastic milk jugs are some of the best containers for winter sowing. However, it depends on what you want to plant in them. You may also find that some plastic boxes or even tall bottles work.
Give your plants some space
As we have already mentioned, plants need space to grow. If there isn't any room in the containers, the seedlings will fight for freedom. Don't let that become a problem. When planting your seeds, leave room for each of them.
Winter sowing is a great way to get your garden looking top-notch! You don't have to be an expert to get this right. Follow our step-by-step guide before embarking on this project. Good luck and happy gardening.
Q&A
Do you have a question that we haven't answered yet? Don't panic. Take a quick look at our frequently asked questions section below:
Can you sow grass seed in the winter?
Winter is not the perfect season to grow grass as the environment is too cold. However, you can use the winter sowing technique to grow grass beforehand.
Can you winter sow tomatoes?
Yes! Tomatoes tend to do well in more relaxed environments. That means that you can winter sow them using a large container. Make sure you give them a lot of space and replant them as soon as the weather gets warmer outside.
What seeds are best for winter sowing?
There are plenty of seeds that are well-suited to winter sowing. Some of the best vegetable seeds are leafy greens, such as cabbage, spinach, and kale. You can also start growing other seeds, such as herbs like basil and rosemary.
What seeds grow the fastest in the winter?
If you plan to winter sow, you must know which seeds grow the fastest. Vegetable seeds that flourish in cooler months include carrots, spinach, and kale.
What are you going to start sowing? Let us know in the comments below.

Leave a Reply