When was the last time you cleaned your toaster? Chances are, you have no idea. Cleaning this small household appliance is hardly a top priority in our busy lives. However, if you’ve had yours for years, it’s essential to ensure that you keep it tidy all the time. The more time and energy you spend on this short-term, the better things will be in the long run. So, how do you get started?
Okay, how do you clean a toaster? As always, we have you covered at Expert Home Tips. This guide will look at the simple steps you can take to ensure that your toaster is as good as new. Set aside around 30 minutes for this chore and get to work. (Spoiler: You don’t have to do it often!)
Step 1: Unplug the toaster
First things first, you need to make sure that you unplug your toaster. Cleaning this appliance when it is plugged in is a recipe for disaster. Before we take a closer look at how to deep clean a toaster, ensure that you take care of this step. For this chore, you will be using some soap and water. If the toaster is plugged in, it could be dangerous. That is true even if it happens to be switched off. You don’t want to take any chances with safety.
Step 2: Get rid of the crumbs
Your toaster is likely to be filled with crumbs and bits of dirt. There’s no shame in it. The second thing you should do when unplugging your toaster is to get rid of these crumbs. One of the ways that you can do that is by tipping the appliance upside down and letting the crumbs fall where they may. When you have done that, you can use a small dustpan and brush to get rid of the excess. Alternatively, you may want to tip the toaster over the bin instead. That means that there will be zero mess.
Step 3: Clean the inside of the toaster
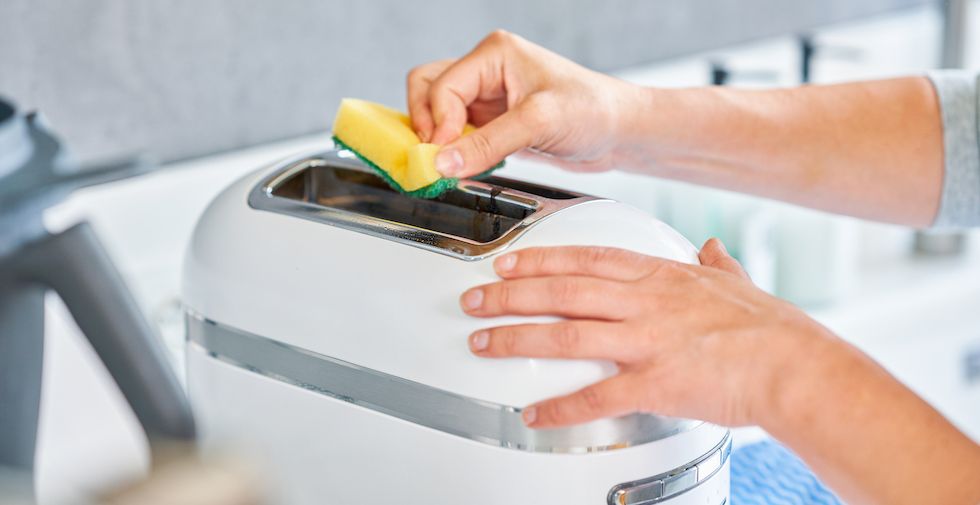
Next up, we’re going to deal with how to clean the inside of a toaster. Fill the sink with water and some gentle soap. You may want to use washing-up liquid for this part of the task. You should ensure that the water is lukewarm for the best results.
Once you have done that, check which parts of the toaster can be removed. In some cases, you will find that there are grids and plates that you can take out of the toaster completely.
If unsure where to start with this step, you should refer to your user manual. That is always important and great for reference. The guide will let you know which parts of your toaster oven can be removed — if any! After removing these smaller parts, you can put them directly into the soapy water mixture. Give them a clean.
Take each internal part out of the water and lay them on a clean cloth. You will need to ensure that all the pieces are 100% dry before you put them back in the toaster oven. To get this right, you should take a clean, dry cloth and wipe them.
Step 4: Use baking soda and water
Now that you have cleaned the inside of your toaster, the next step is to get rid of any burn marks. This step also works if you have sauces stuck to the side of the toaster that become hard to shift. Whatever the case, you should start by making a thick paste out of baking soda and a bit of water. Mix the solution well. You can apply this magic cleaning solution directly to the marks that have gathered on your toaster oven.
You should leave the solution to work for a few minutes. In that time, gather a toothbrush that you no longer use or a cleaning cloth. Rub the solution off the toaster oven. As you do so, you should find that the marks start to disappear. You may have to use some elbow grease to ensure you get the bulk of the job done here. Get to work scrubbing!
Step 5: Clean the exterior of the toaster
After completing all the other steps, it’s time to learn how to clean a toaster exterior. If your toaster is made of stainless steel, you may need to get a special metal cleaner for it. However, if you have a toaster made of plastic or other materials, you can grab some of the Pink Stuff and get to work. Simply use a clean cloth to scoop some of the cleaning cream out and rub it directly onto the outside of the toaster. You can use a circular motion when doing this. Then, you should leave it for around 10-15 minutes.
Grab a damp cloth and remove the Pink Stuff. This quick and easy way to deep clean a toaster in minutes. When you are removing the cleaning product with the cloth, you should notice that the marks and scuffs start to disappear right away too.
Step 6: Dry your toaster
The final step when deep cleaning your toaster is to ensure it is dry. You can use a clean, dry cloth to get this part of the step right. Make sure you go over any of the areas you have cleaned. You don’t want there to be any dampness here at all. Wait for a few hours and ensure that your toaster has dried out before you attempt to use it.
As you can see from our guide, learning how to clean a toaster takes no time at all. You have all the tools you need to complete the job in less than 30 minutes. So when deep cleaning your kitchen, ensure you don’t overlook this vital part of the puzzle.
Q&A
Did we miss something? If there’s a question on your mind, don’t panic. We’ve got you covered. Let’s look at the answers to the frequently asked questions on this topic.
Is it safe to wash a toaster?
You should not wash a toaster as it is an electrical appliance. However, if your toaster happens to have removable grids or a crumb tray, you can take them out. Submerge them in soapy water and give them a clean. Before you return them to the toaster, you must ensure they are 100% bone dry. Mixing water with electricity is never smart.
How often should you replace your toaster?
When it comes to electrical items, it’s always better to be safe than sorry. You might find that you can refer back to your manufacturing guide. However, as a golden rule, you should replace your toaster every five to 10 years. If you find fault with the appliance before then, you can contact the manufacturer for more details.
How do you get burnt stuff off a toaster?
One of the most annoying things about learning how to clean a toaster is burnt stuff. When your food burns, it can leave nasty marks on the side of your appliance. One approach you may want to try is using a combination of baking soda and warm water. Apply the mixture to the area and leave for a few minutes. When you have done that, the next step is to take a soft-bristled toothbrush and gently remove the paste and (with luck!) the burn mark.
Can you get sick from a dirty toaster?
It’s vitally important that you clean your toaster regularly. If you leave the dirt and crumbs to gather in the toaster, it can fast become a breeding ground for bacteria. In some cases, that may lead to illnesses and sickness. For that reason, you should learn how to clean a toaster and make sure that you do it regularly. It makes a big difference.
If you have any questions, leave them in the comments below!


Leave a Reply