
Why not make this Easter extra special, by crafting a DIY pair of bunny ears?
They're so easy to make - even a DIY amateur could manage them. Taking around half an hour to make, they're the perfect last-minute addition to your Easter Sunday.
Grab your craft supplies, put your Easter egg down (there's still a few days to go) and let's get started!
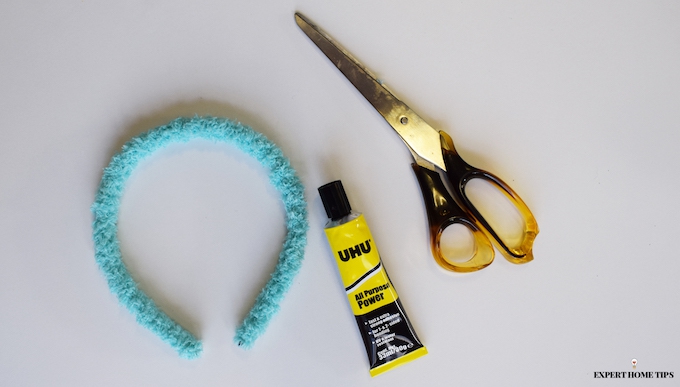
What you need:
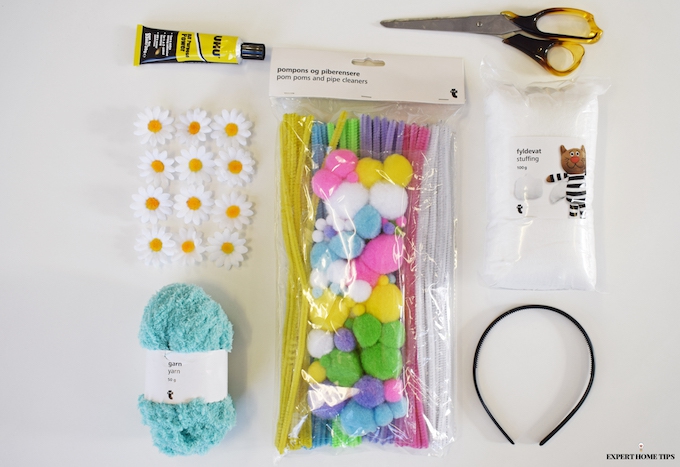
- Scissors
- Uhu glue - you can try other brand but I swear by this stuff!
- Plastic headband
- Plastic flowers
- Wool in colour of choice
- Stuffing
- Pompoms
- 4 white pipe cleaners
I got most of my supplies from Flying Tiger Copenhagen, as I love their low-cost crafting supplies. The plastic headband I purchased from there already had flowers stuck on it, which I removed for the purpose of this tutorial.
How to make your DIY Easter bunny headband
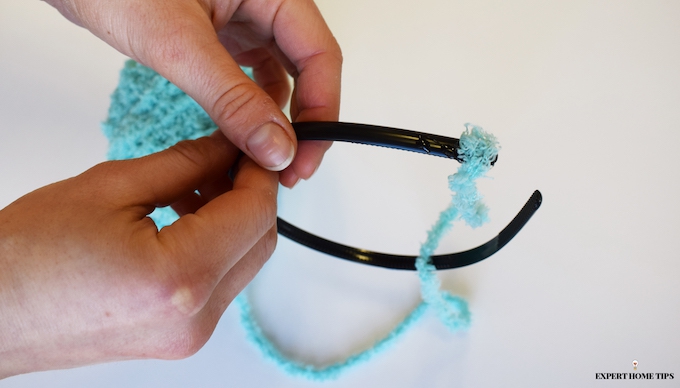
1. Glue along the plastic headband
The plastic headband is going to become the centrepiece of your design. We want to make sure it's well covered in your wool of choice.
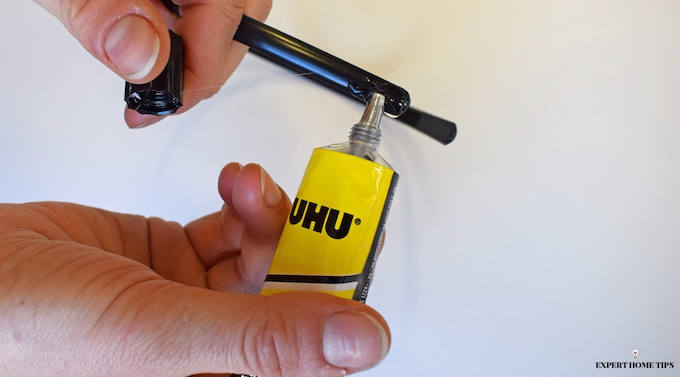
Apply a thin layer of UHU glue starting from one end of the headband. Continue the glue up a few centimetres.
2. Begin wrapping wool around the headband
Fasten your wool firmly onto the end of the headband. Then, begin wrapping the wool around the headband. Continue past the glue line, until you near the other end of the headband.
Add glue to the other end of the headband, and continue to wrap. Press the wool down tightly to fasten, then cut end.
You should now be left with a neatly covered headband.
3. DIY your easter bunny ears
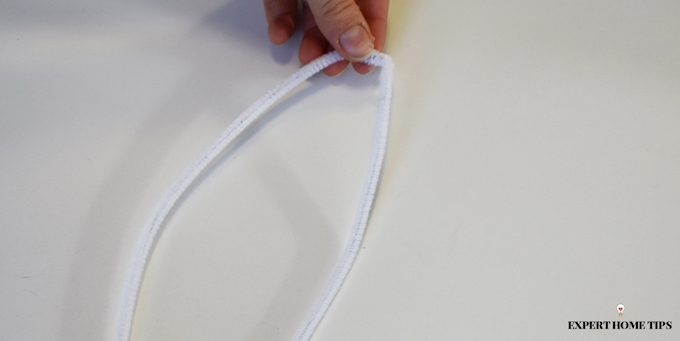
Now it's time to make the all-important ears. This is done by joining two of your four pipe cleaners.
Wrap one pipe cleaner tightly around the end of the other. Once completed, bend the joint so that it resembles a bunny ear shape.
Repeat with other pipe cleaners to create a pair of ears.
4. Attach bunny ears onto Easter headband

Attach the ears onto the headband by wrapping both ends under and over the band. Try and keep the wire tight around the headband to prevent movement.
5. Build-up your bunny ears
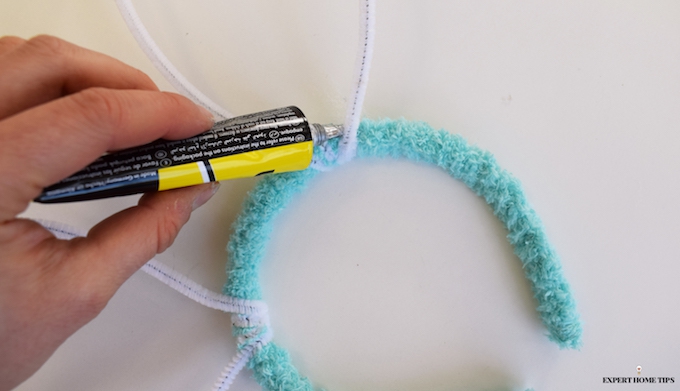
Now, your DIY bunny ears are hopefully already looking pretty cute. It's now time to make them look even more adorable.
Start by applying a thin layer of UHU glue from the base of the pipe cleaner ears to the join at the top.
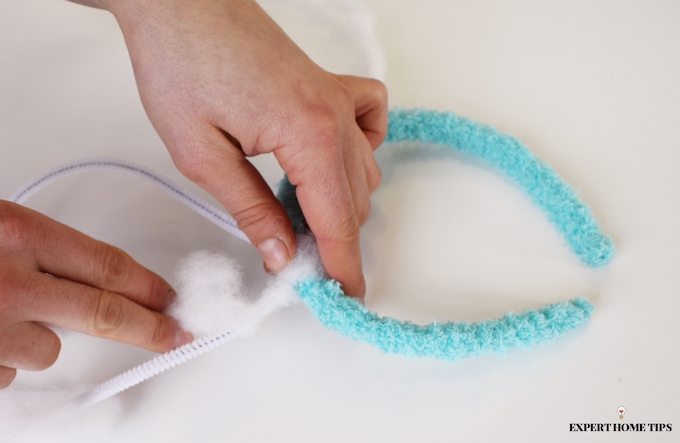
Now, take some stuffing and pull it into a 'strip'. Attach the strip at the base, then slowly and gently, begin wrapping it around the pipe cleaner. You want to create a solid, sturdy layer that covers the pipe cleaner. To do this, keep the wool relatively taught, but not excessively so.
Work your way up to the join, then add glue onto other side and repeat the process. You will need to use several strips of wool as you go along.
Once you've completed your first, taut layer, you'll need to add a second. Apply another layer of UHU glue to half of the ear. This time, you're after a
This time, you're after a lighter, 'fluffier' layer. To achieve this, don't pull the wool taught, but wrap it loosely around the ears.
Repeat for the second ear, then move on to step 6.
6. Glue flowers & pompoms onto your DIY Easter headband
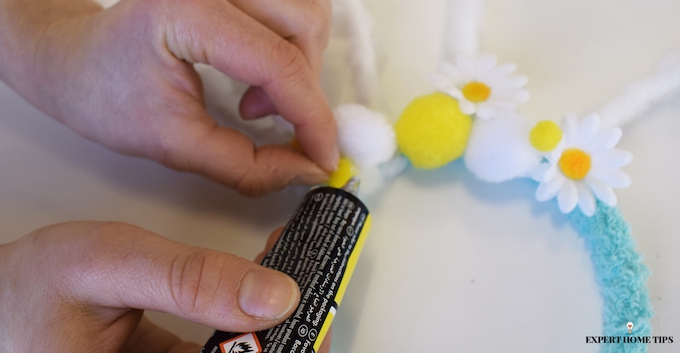
Now for my favourite part. Its time to go mad with your flowers and pompoms.
There are no rules for how to go about this, however, I would recommend starting big and getting smaller as you build up.
Apply a blob of UHU onto the base of your additions and stack them into place one-by-one. They will sit firmly - I told you, UHU is the best!
Think about pops of colour and a balance, and continue until you're satisfied with the results.
Although I wouldn't advise adding too much weight to the ears themselves, a few small, colourful pompoms really help finish the look.
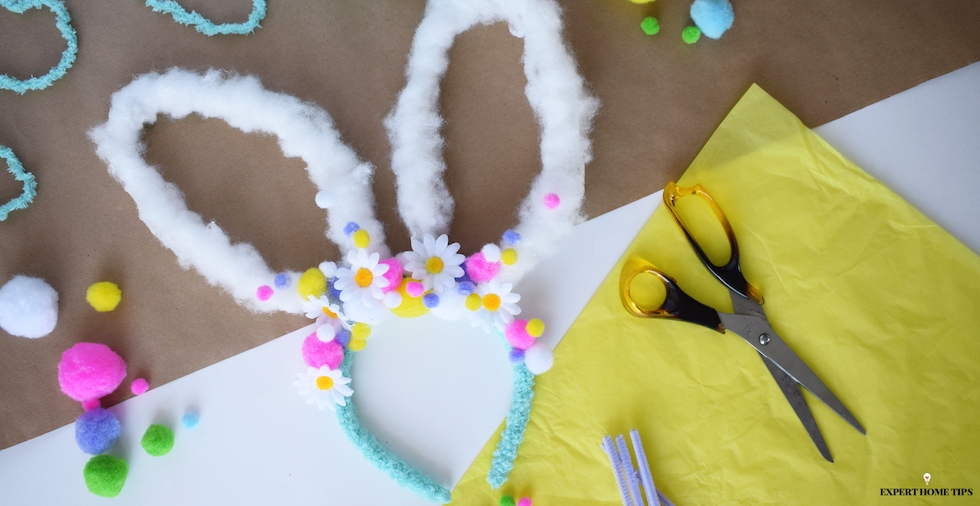
7. Marvel at your DIY Easter bunny ear creation!
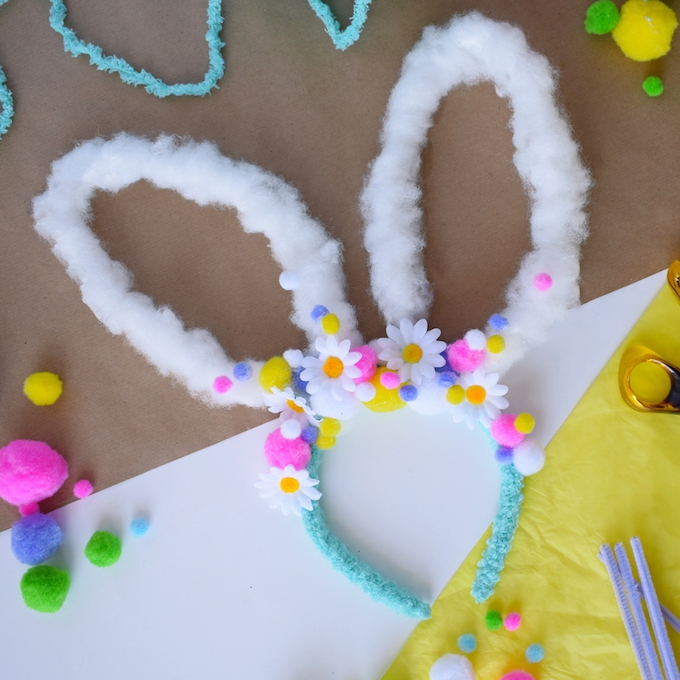
Now it's time to sit back, and marvel at your creation. How great do they look?
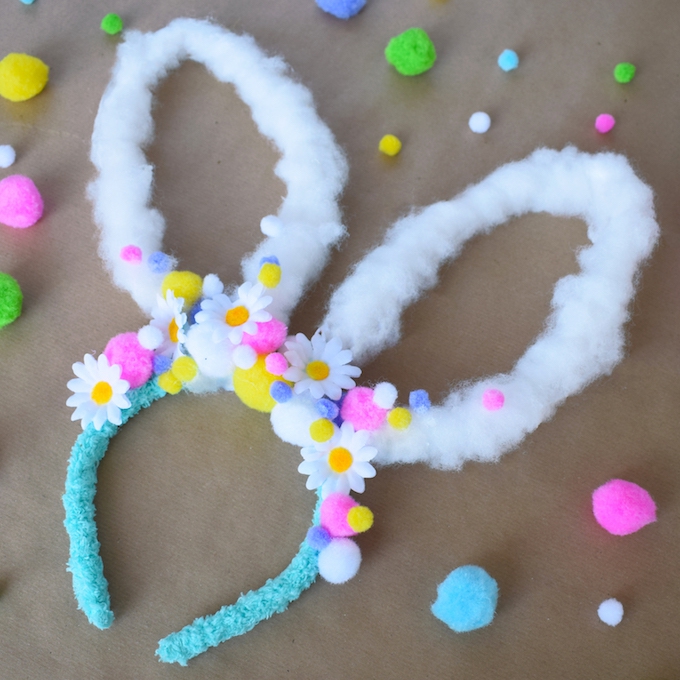
After all that hard work, maybe you do deserve an early Easter egg after all!
Who will be wearing your DIY Easter bunny ears? Let me know in the comments below!

Leave a Reply